Question 4
Recreate this design using only a ruler and compass —
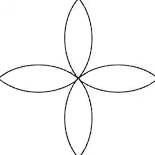
We want to make a design using only a ruler and a compass.
Step 1 — Draw a square
First, let us draw a square. Let us name its vertices A, B, C, and D. We can choose any side length for our square.
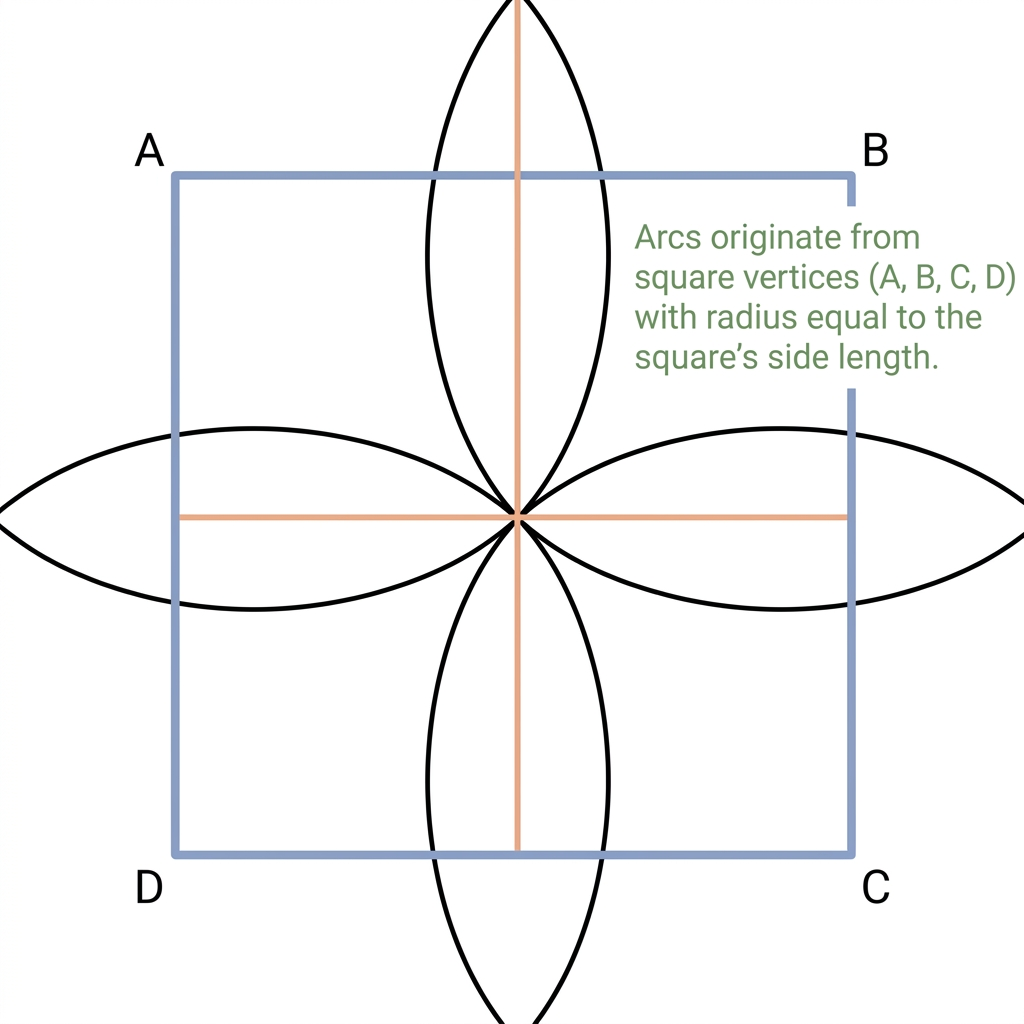
Step 2 — Find midpoints of sides
Next, we find the middle points of each side. Let us find the midpoint of side AB. Place the compass needle at point A. Open the compass more than half of AB. Draw arcs above and below AB. Place the compass needle at point B. Use the same opening. Draw arcs that cut the first arcs. Join the two points where arcs cut. Use a ruler. This line is the perpendicular bisector of AB. It cuts AB at its midpoint. Let us call this point P. Repeat this process for side BC. Find its midpoint, call it Q. Find midpoint of CD, call it R. Find midpoint of DA, call it S. Lines PR and QS are perpendicular bisectors. They cross each other at the center of the square.
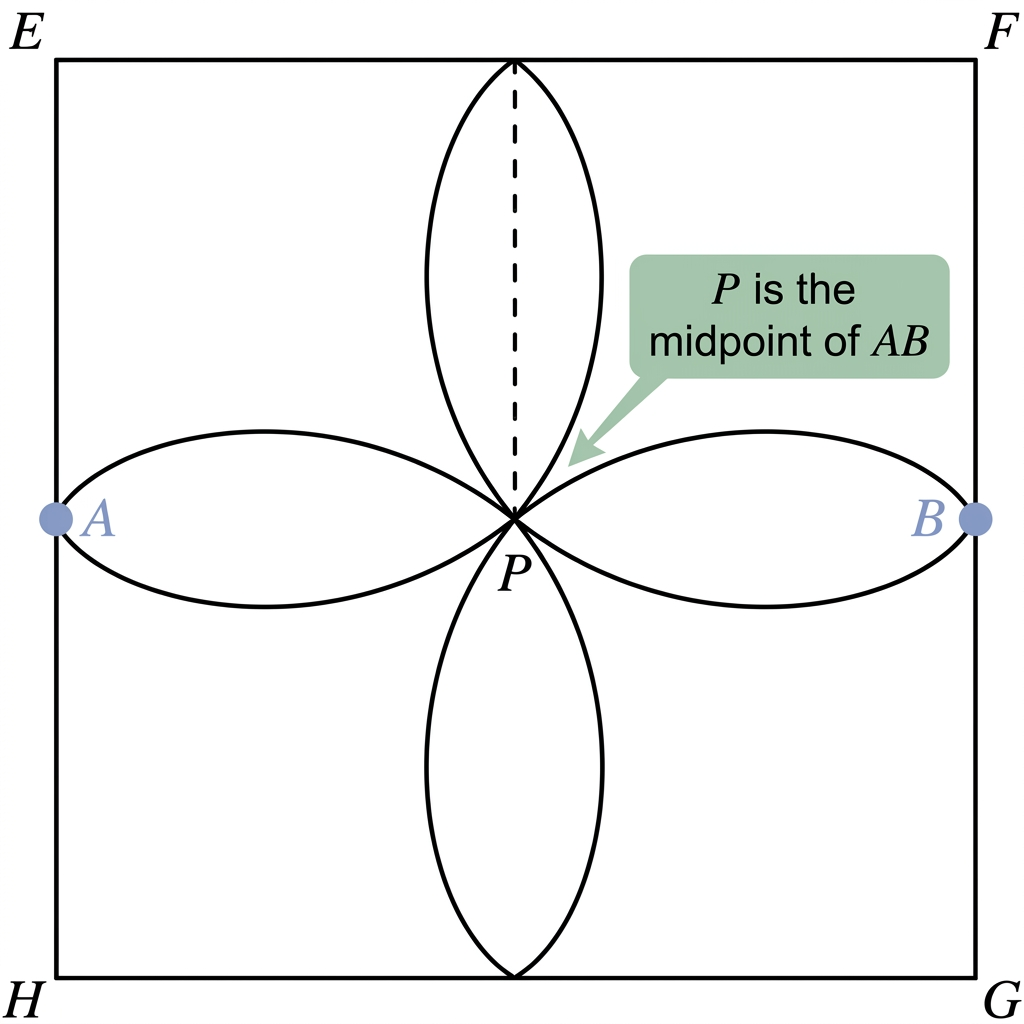
Step 3 — Draw the semicircles
Now, we will draw the curved parts. Let us set the compass opening. The radius will be the distance from A to P. This is half the length of side AB. So, the radius is AP. Place the compass needle at point P. Draw a semicircle from A to B. This semicircle will be inside the square. Repeat this for the other sides. Place the compass needle at point Q. Draw a semicircle from B to C. Place the compass needle at point R. Draw a semicircle from C to D. Place the compass needle at point S. Draw a semicircle from D to A.
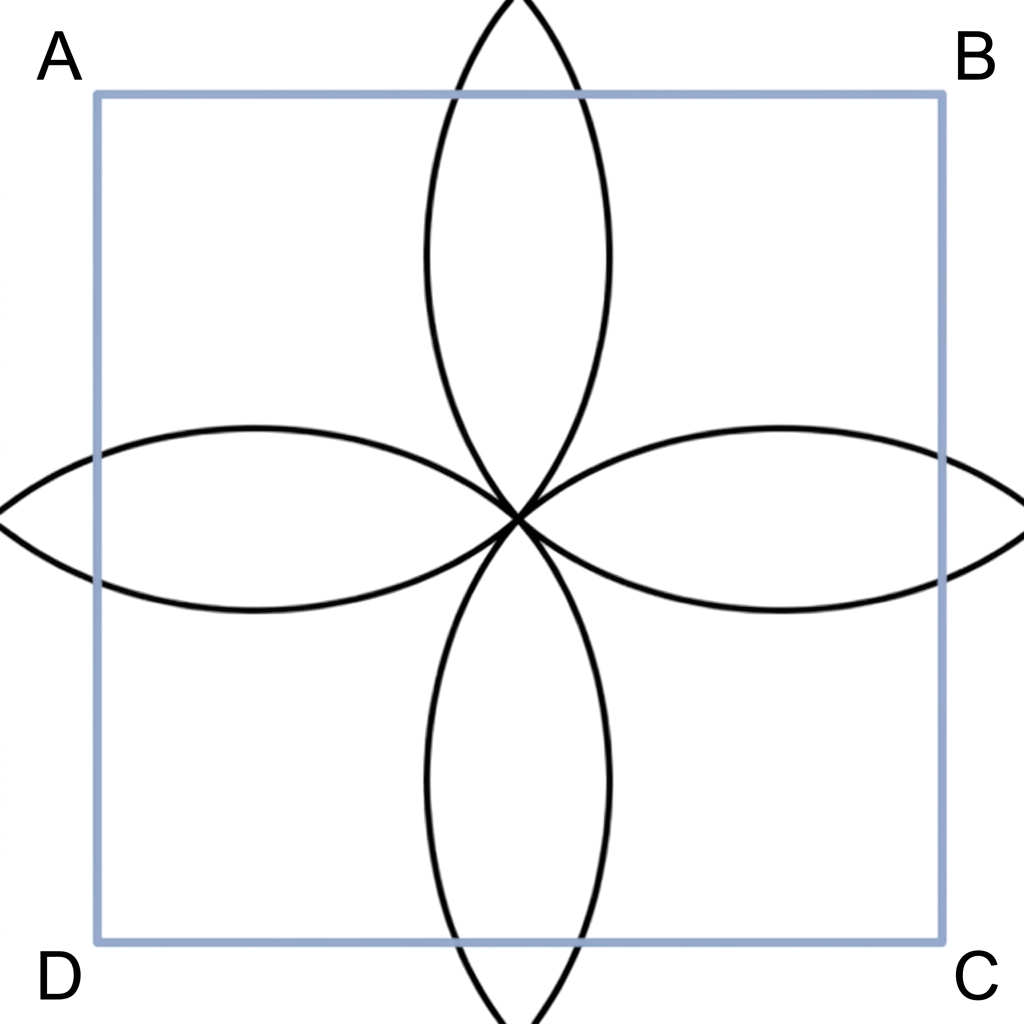
Step 4 — Colour the boundary
Finally, we make our design stand out. We use a coloured pencil. Colour the boundary of the shape. This means colouring the four semicircles. This will highlight the design.
Answer
The design is created by following these steps:
(i) Draw a square and label its vertices A, B, C, D. (ii) Find the midpoints of the sides AB, BC, CD, and DA using perpendicular bisectors. Label these midpoints P, Q, R, and S respectively. (iii) Set the compass radius to the length of AP (half the side length of the square). (iv) With P as the center, draw a semicircle connecting points A and B inside the square. (v) With Q as the center, draw a semicircle connecting points B and C inside the square. (vi) With R as the center, draw a semicircle connecting points C and D inside the square. (vii) With S as the center, draw a semicircle connecting points D and A inside the square. (viii) Colour the boundary of the resulting shape to make the design visible.
More questions in FIO
When constructing the perpendicular bisector, is it necessary to have the same radius for the arcs above and below XY? Explore this through construction, and then justify your answer.
[Hint 1: Any point that is of the same distance from X and Y lies on the perpendicular bisector.
Hint 2: We can draw the whole line if any two of its points are known.]
Is it necessary to construct the pairs of arcs above and below XY? Instead, can we construct both the pairs of arcs on the same side of XY? Explore this through construction, and then justify your answer.
While constructing one pair of intersecting arcs, is it necessary that we use the same radii for both of them ? Explore this through construction, and then justify your answer.
Recreate this design using only a ruler and compass —
Justify why AB in Fig. 6.4 is the perpendicular bisector.
Can you think of different methods to construct a 90° angle at a given point on a line using a rope?
Construct at least 4 different angles. Draw their bisectors.
Construct the 8-petalled figure shown in Fig. 6.5.
In Step 2 of angle bisection, if arcs of equal radius are drawn on the other side, as shown in the figure, will the line OC still be an angle bisector? Explore this through construction, and then justify your answer.
What are the other angles that can be constructed using angle bisection? Can you construct 65.5° angle?
Come up with a method to construct the angle bisector using a rope.
Construct the following figure.
How do we construct the petals so that they are of the maximum possible size within a given square?
Construct at least 4 different angles in different orientations without taking any measurement. Make a copy of all these angles.
Construct the Fig. 6.6.
Construct 4 pairs of parallel lines in different orientations.
Construct the following figure.
Use support lines in Fig. 6.11 to construct a pointed arch. Make different arches, by changing the radius of the arcs.
Make your own arch designs.
Construct the following figures:
Optical Illusion: Do you notice anything interesting about the following figure? How does this happen? Recreate this in your notebook.
Construct this figure.
[Hint: Find the angles in this figure.]
Draw a line and mark a point P anywhere outside the line. Construct a perpendicular to the given line through P.
[Hint: Find a line segment on whose perpendicular bisector passes through P.]
How can the tangram pieces be rearranged to form each of the following figures?
Are the following tilings possible?